
Homemade Instant Pot Yogurt
Making yogurt in an instant pot is one of those kitchen skills that feels both old-fashioned and modern – the best of both worlds. It’s simple, hands-off, and gives you total control over what ingredients go into your food. It is quite satisfying to open your fridge to find a jar of thick, creamy, homemade yogurt that you made yourself. It’s wholesome, budget-friendly, and incredibly easy once you know the rhythm.

This post contains affiliate links. As an Amazon Associate, I receive a small commission at no extra cost to you. Read my full disclosure here.
My family consumes almost exclusively raw milk from a local farmer, and I detail how to make Raw Milk Yogurt in this post, and how to make Raw Milk Greek Yogurt here. These recipes use a cold start method that preserves the proteins and enzymes that are destroyed pasteurization. But if you don’t have access to raw milk or the thought of it weirds you out (or you just want a thick, creamy, fresh yogurt), this Instant Pot Yogurt recipe is for you!
This exact recipe works with raw milk, too! It will not turn out quite as thick, but can still be enjoyed with granola or in a smoothie. See the notes below for making this creamy yogurt with raw milk specifically. Whether you use raw milk from your homestead cow or a local farmer, or store-bought milk from the grocery store, you’ll end up with a naturally cultured yogurt that tastes far better than anything you can buy.
Let’s dive into the step-by-step process, plus a few tricks I’ve learned through years of homestead kitchen trial and error (because yes, I’ve had my share of thin, runny yogurt batches too).

why make yogurt at home?
Before we start heating milk and whisking cultures, let’s talk about why you should make yogurt from scratch – especially when you have a fridge full of options at the store.
1. It’s better for you. Homemade yogurt has no fillers, gums, or preservatives. Many commercial yogurts contain stabilizers, thickeners, and added sugars to mimic the texture and flavor that real fermentation naturally provides. When you make it yourself, you control everything — from the milk source to the sweeteners and flavorings. Additionally, this can be a great option for people who are sensitive to pasteurized dairy as the longer the yogurt ferments, the less lactose there will be at the end of the process.
2. It’s cost-effective. A single half-gallon of milk can yield about a quart and a half of yogurt. Making your own yogurt saves money: even if you buy organic, grass-fed milk at $10 a gallon, a quart of yogurt will only cost you around $2.50 to make. You’ll save a few dollars every batch, and it adds up fast, especially if your family goes through yogurt like mine does.
3. It reduces waste. No more single-use plastic containers. Store your yogurt in glass jars or reusable containers and enjoy a truly sustainable kitchen swap.
4. It tastes delicious. Once you’ve had fresh, homemade yogurt, it’s hard to go back. The flavor is tangy yet mellow, the texture is velvety, and the satisfaction of knowing you made it yourself makes every bite taste even better.
5. It uses what you already have. If you have an Instant Pot, you already own an amazing yogurt incubator. No extra gadgets required — just milk, a bit of starter, and time.
everything you’ll need to make instant pot yogurt
ingredients
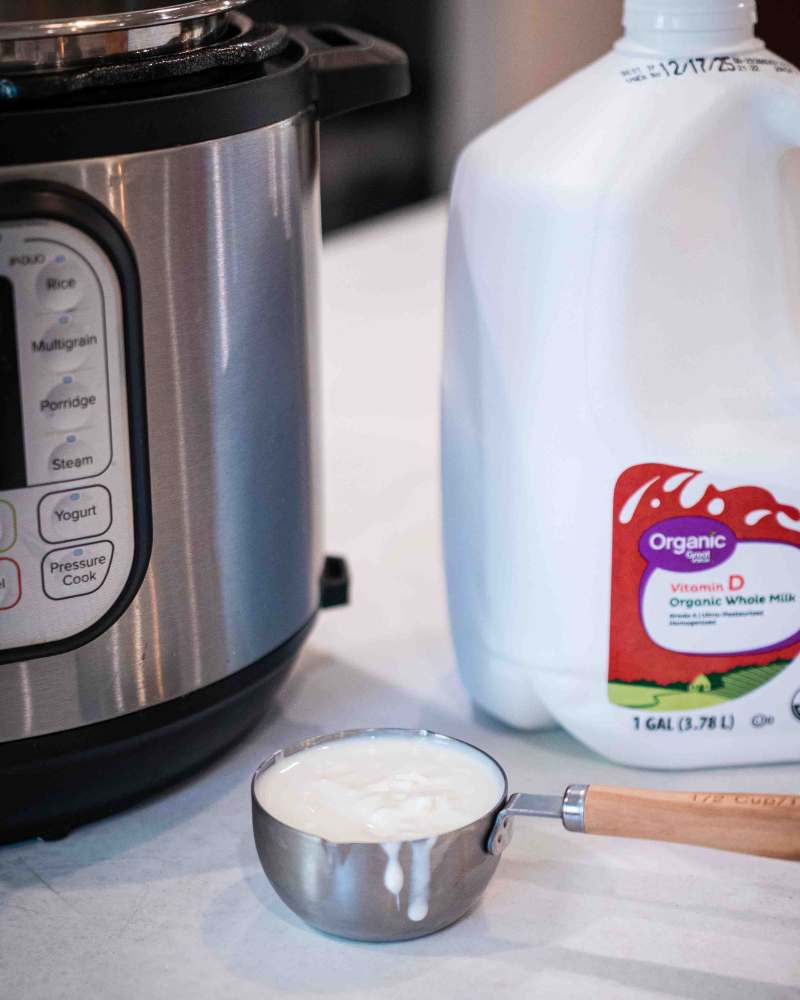
1/2 gallon (8 cups) whole milk – whole milk gives the creamiest results, but you can use 2% or even goat’s milk
1/4 cup plain yogurt (with live active cultures) – this is your starter. Choose one with only milk and active cultures on the ingredient list. Once you’ve made your first batch, you can use your own yogurt as a starter for future batches.
equipment
Instant Pot with the “Yogurt” function
Thermometer (not necessary, but can be helpful the first few times)
If you’re using raw milk and want to skip the high temperature heating step, follow this recipe for Raw Milk Instant Pot Yogurt or this recipe for Raw Milk Greek Yogurt.


step-by-step: how to make instant pot yogurt
1. Pour and heat the milk. Pour your milk directly into the stainless-steel insert of your Instant Pot. Press the “Yogurt” button until the display reads “Boil.”
This cycle gently heats the milk to around 180°F. Heating the milk helps denature the proteins, which creates a thicker, creamier yogurt.
Once the cycle ends, check the temperature with your thermometer. If it hasn’t reached 180°F, you can turn on the “Saute” function for a few minutes while stirring to bring it up to temp.

2. Cool the milk. After the milk has been heated, it’s time to let it cool down. You’ll want it between 105°F and 115°F before adding your starter.
You can let it cool naturally (about 30–45 minutes) or speed up the process by removing the inner pot and setting it in a sink filled with cold water. Just don’t add the starter too early — if the milk is too hot, it will kill the beneficial bacteria before they get a chance to do their job.
3. Add the starter. Once your milk has cooled, whisk in 1/4 cup of yogurt with live active cultures. Make sure to mix thoroughly so that the cultures are evenly distributed.
4. Incubate. Return the insert to the instant pot, close the instant pot lid (venting position is fine), and press the “Yogurt” button again. Set the timer for 24 hours. This step is where the magic happens — the live cultures ferment the milk, developing that thick texture and characteristic yogurt flavor. The longer the incubation time, the tangier your yogurt will be. For mild yogurt, incubate for 8 hours. We prefer the thicker texture and stronger tangy flavor, so I always incubate for the full 24 hours to give the good bacteria the maximum amount of time to multiply.
Pro Tip: Don’t stir or disturb the yogurt during the fermentation process. If it is stirred, it will not thicken properly.

5. Chill overnight. When the incubation cycle finishes, carefully remove the insert, cover it with plastic wrap, and place it in the refrigerator overnight. This step helps the yogurt fully thicken and develop its final texture.
6. Store yogurt and save starter. In order to keep your yogurt nice and thick, DON’T STIR OR TRANSFER to another container. The more it is moved or messed with, the runnier it will be. It is best used within 10-14 days, though it rarely lasts that long in my house. Save 1/4 cup from this batch of yogurt to use as a starter culture for the next one.
Pro Tip: I use my instant pot often, so I can’t afford for my instant pot insert to be sitting in the fridge with my yogurt in it for days at a time. For this reason, I bought a second insert so I can use one for making/storing yogurt and the other one for everything else.

how to make raw milk yogurt in the instant pot
Some people are cautious about warming raw milk without scalding first. The naturally occurring bacteria in the raw milk could compete with the yogurt culture, preventing proper inoculation.
If you’re using raw milk and do not want to make cold start yogurt, you have two different options:
1. Gentle Heat Method: Warm the milk to 110°F, stir in your starter, and incubate for 24 hours. This method preserves more of the beneficial bacteria and enzymes in the milk but can result in a thinner yogurt.
2. Traditional Method: Heat the milk to 180°F, then cool and culture as usual. This method produces thicker yogurt but kills some of the natural enzymes in raw milk.
Both are great options — it just depends on your priorities for thick yogurt and nutritional profile.
how to thicken your instant pot yogurt even more (optional)
If you prefer a Greek-style yogurt, you can strain it after chilling. Pour your yogurt into an organic cotton yogurt straining bag and let it strain for 2-4 hours in the fridge until it reaches the thickness you’re looking for.
You can save the whey that drains off, it’s full of probiotics and can be used in smoothies, baking, or as a starter for lacto-fermented veggies like this fermented cabbage or fermented carrots.
If the yogurt becomes too thick or too sour, you can stir a little whey or milk back in.

troubleshooting common instant pot yogurt problems
Even the most seasoned home cooks have a batch that doesn’t turn out quite right sometimes. Here are some ideas on how to fix common problems:
- Runny yogurt: The milk may not have heated high enough, or the starter wasn’t active. Try incubating longer next time.
- Grainy texture: The milk may have cooled too much before adding the starter, or the culture didn’t mix evenly.
- Too tangy: Incubation lasted too long. Reduce the ferment time by an hour or two next batch.
- Watery layer on top: That’s just whey — stir it back in or strain it for thicker yogurt.
flavor variations for instant pot yogurt
Once you master the basic process, you can try different add ins and toppings to flavor your yogurt. Here are some of our favorites:
Vanilla Yogurt: Stir in a couple drops vanilla extract and your favorite sweetener.
Honey & Cinnamon: Sweeten with a drizzle of raw honey and a sprinkle of cinnamon.
Berry Parfait: Layer fresh berries or jam and homemade yogurt in a glass jar. So pretty!
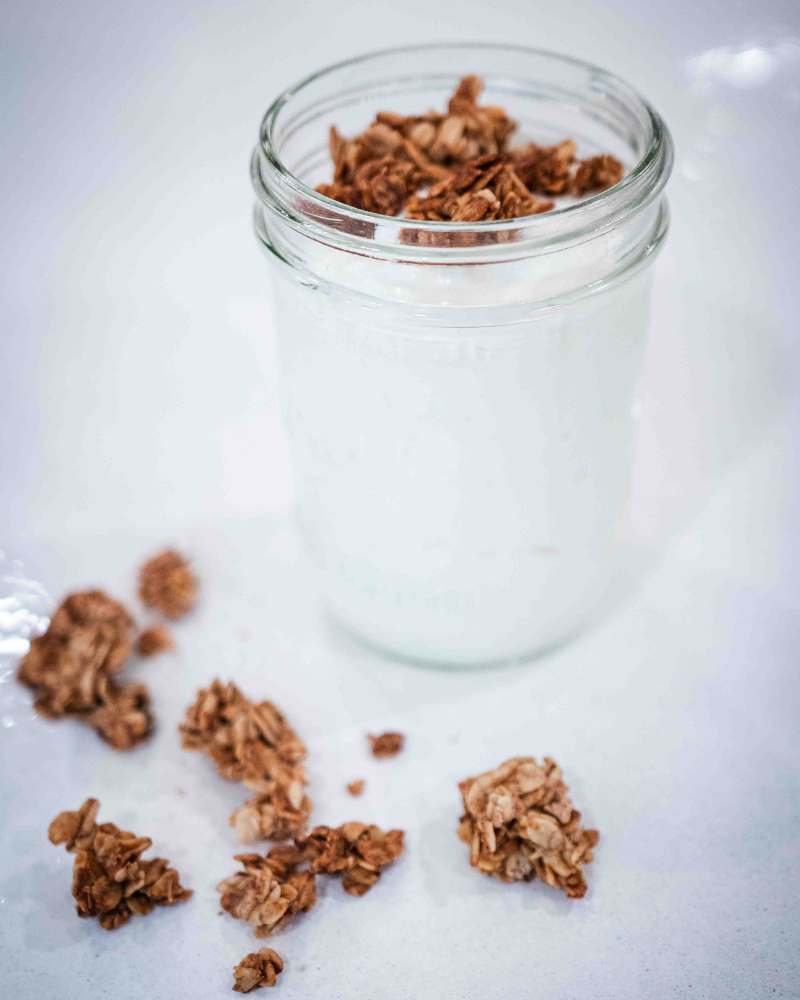
Maple Granola: Add maple syrup and this Easy Homemade Granola for a quick and healthy breakfast.
Lemon Cream: Stir in freshly grated lemon zest and a little raw honey for a bright, refreshing treat.
how to use instant pot yogurt
Homemade yogurt isn’t just for breakfast. Here are some of my favorite ways to use yogurt around my kitchen:
- As a base for smoothies or overnight oats
- In baked goods like scones, biscuits, or pancakes for extra tenderness
- Whisked into salad dressings or marinades
- As a sour cream substitute for baked potatoes or tacos
- Mixed with herbs and garlic for a quick homemade dip
It is one of the most versatile ingredients you can make – and the Instant Pot makes it almost effortless! As a busy mom and homemaker, I love an easy kitchen staple that doesn’t compromise on ingredients. Using high quality milk guarantees a nutritious end product, and the Instant Pot does all the work for you. No need to constantly check temperatures to make sure the yogurt is incubating properly. It’s the kind of homestead rhythm that fits easily into my daily routine. After you enjoy the first batch of homemade yogurt you made from scratch, you’ll understand why this has become a staple in so many homestead kitchens.
Instant Pot yogurt is simple, satisfying and sustainable – exactly what real food should be.

Instant Pot Yogurt
Making yogurt in an instant pot is a simple, hands-off way to make thick, creamy yogurt without any additives. A little plain yogurt is used as the starter culture, combined with whole milk - the result is healthy, protein-rich breakfast or snack.
Ingredients
- 1/2 gallon (8 cups) whole milk
- 1/4 cup plain yogurt with live and active cultures
Instructions
- Pour your milk directly into the stainless-steel insert of your Instant Pot. Press the “Yogurt” button until the display reads “Boil.”Let the cycle run until it's finished.
- Let the milk cool down to around 105°F.
- Once the milk has cooled, whisk in 1/4 cup of yogurt with live active cultures.
- Return the insert to the instant pot, close the instant pot lid (venting position is fine), and press the “Yogurt” button again. Set the timer for 24 hours.
- When the incubation cycle finishes, carefully remove the insert, cover it with plastic wrap, and place it in the refrigerator overnight.
- In order to keep your yogurt nice and thick, DON'T STIR OR TRANSFER to another container. The more it is moved or messed with, the runnier it will be.
- Save 1/4 cup from this batch of yogurt to use as a starter culture for the next one.
Notes
The longer the incubation time, the tangier your yogurt will be. For mild yogurt, incubate for 8 hours.
Don’t stir or disturb the yogurt during the fermentation process. If it is stirred, it will not thicken properly.
Instant pot yogurt is best used within 10-14 days.
Recommended Products
As an Amazon Associate and member of other affiliate programs, I earn from qualifying purchases.

pin this recipe for later