
Homemade Raw Milk Mozzarella Cheese
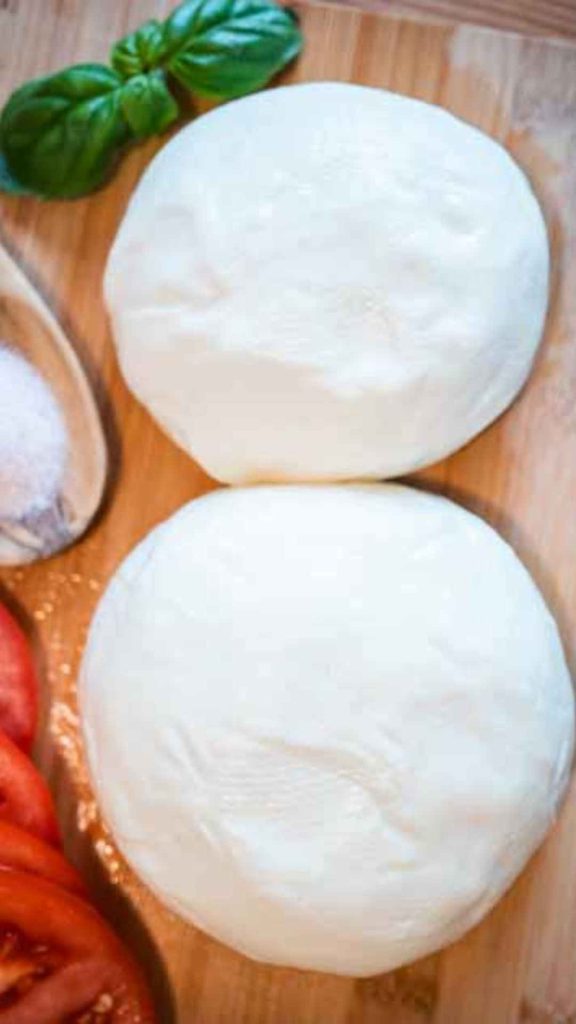
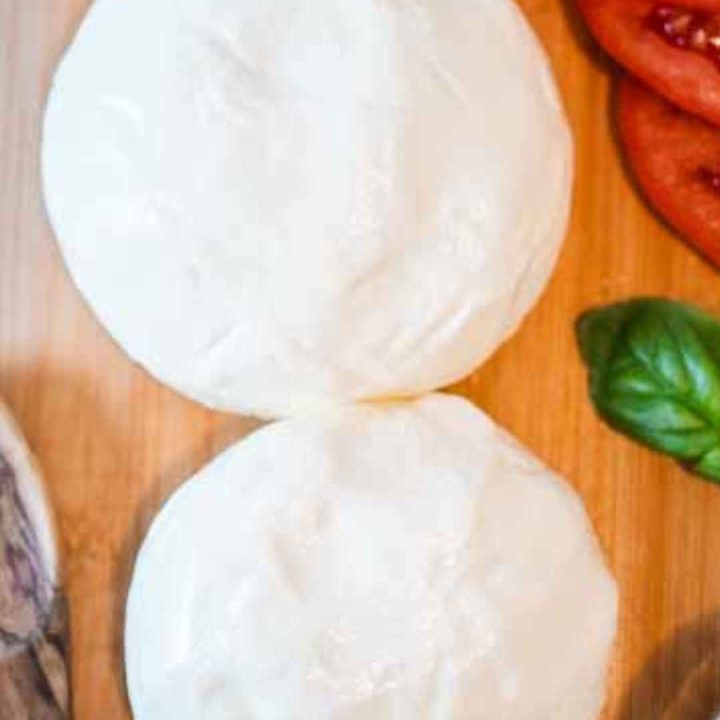
This raw milk mozzarella cheese is so creamy and salty, and honestly just tastes so fresh. It’s so delicious on pizza, lasagna, or just as a snack. Learn how simple it is to make homemade cheese!

This post contains affiliate links. As an Amazon Associate, I receive a small commission at no extra cost to you. Read my full disclosure here.
So many people are intimidated by cheesemaking. And I get it, it is not a well known skill and can take a little time to get the hang of. But with anything, a little practice can really pay off! And in this case, the payoff is delicious homemade cheese. Believe me when I say it’s worth a little trial and error! Follow this tutorial and you’ll be a cheesemaker in no time.
We have been sourcing raw milk from a local farm for quite a while. I really try to make most of our dairy products from scratch using raw milk, as it is so much healthier and more nutrient dense than pasteurized milk. We love to make homemade raw butter, raw sour cream, and raw milk ice cream. We go through a lot of cheese in our house, so that was next on the list of recipes to master!

everything you’ll need to make your own cheese
ingredients
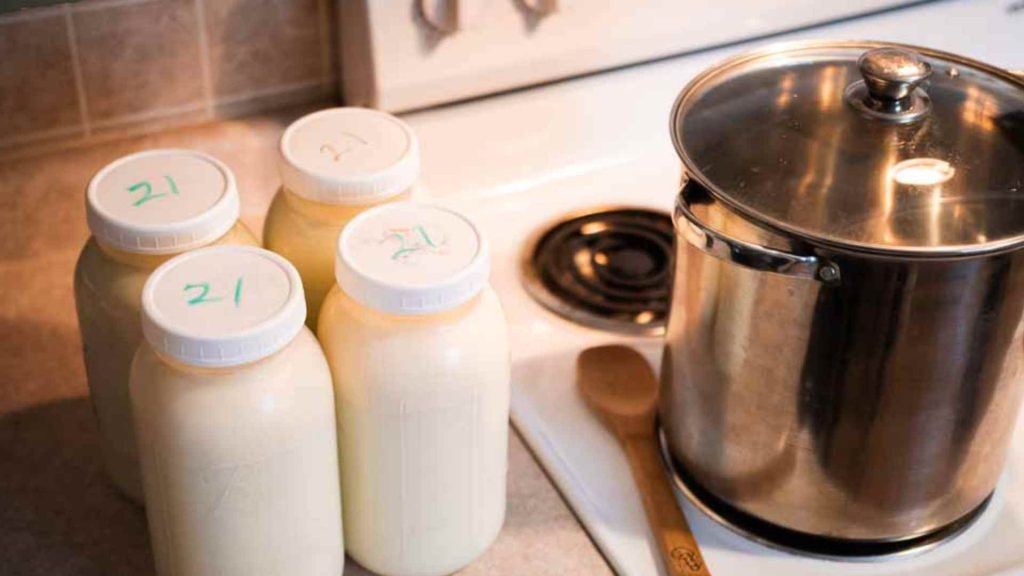
Raw milk: Obviously, in order to make raw cheese you need to start with raw milk. If you don’t have a milk cow, you can use THIS WEBSITE to locate a farm that sells raw milk near you. If there is nothing in your area, the best way to source raw milk (in my opinion) is simply word of mouth. Get to know the farmers and homesteaders near you, and chances are, you’ll have a few options before too long.
Store-bought milk will also work for this recipe as long as it’s not ultra high temperature (UHT) pasteurized.
Filtered water: We use a Berkey and LOVE it.
Citric acid: Citric acid is the powdered form of the sour acid in lemons and limes. When added to the milk, it instantly adjusts the pH so it’s ready or the rennet.
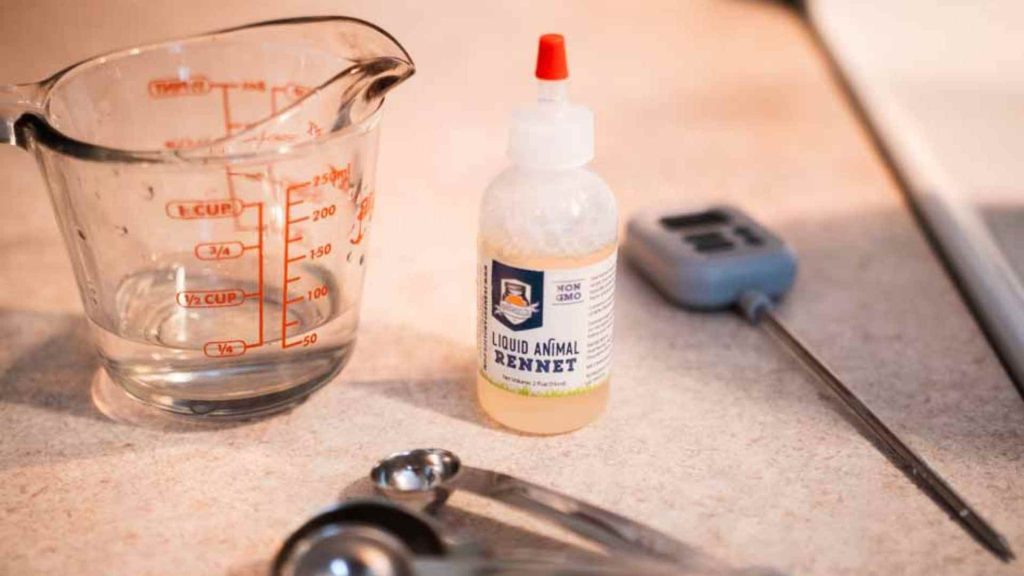
Animal rennet: This is what coagulates the milk into curds. I use this liquid rennet by Fermentaholics. Any liquid animal rennet will work – just be aware that some are “extra strength” and the amount will need to be adjusted if this is what you use.
Salt: Redmond’s Real Salt is what I use in everything. We love our cheese nice and salty, and this salt makes our fresh mozzarella cheese taste so good!
equipment
- Large stainless steel pot with a cover
- Wooden spoon or slotted spoon
- Digital thermometer
- Colander or strainer
- Sharp knife
- Rubber gloves


recipe tips and notes:
– If you are opting to use milk from the grocery store instead of raw milk for this recipe, any milk will work (whole milk, 2%, skim) as long as it is NOT ultra-pasteurized milk. This method of ultra high temperature (UHT) pasteurization denatures the proteins in the milk so that they are unable to solidify into curds.
– The fresher the better when using raw milk to make cheese. I try not to use milk that is older than 3 days past milking. The more time that passes, the more time different bacteria can develop and interfere in the cheesemaking process. Older milk usually still works, but might just look a little different at each step.
– If you are using your homemade raw mozzarella cheese in a recipe where you want it to melt, try shredding it instead of cutting it into cubes or slices. Homemade mozzarella melts differently that store-bought, largely because it is easily overworked during cheesemaking.
– I don’t heat the milk above 100 degrees F so that I can preserve as many nutrients and enzymes as I can in the raw milk.
– Cheesemaking is a bit of work, so I like to use two gallons of milk which usually yields about two pounds of cheese. If you don’t need this much cheese or you don’t want to use that much milk (or you don’t have a pot large enough to comfortably hold two gallons of milk), this recipe can be divided in half. All of the steps are the same.
– After making cheese, you will be left with a lot of whey. Don’t worry – that doesn’t need to be wasted! Later on in this post I will share some ideas of how to use up the whey.
– Animal rennet comes from the inside of a calf’s stomach. Because a calf must die in order to harvest the rennet, some people choose to use vegetable rennet instead. Just FYI that is an option.
how to make raw milk mozzarella cheese
skim the milk
1. Scoop the cream off the top of the raw milk. Most of the cream is squeezed out during the cheesemaking process, so it makes sense to remove it first instead of it ending up in the pot with all of the excess whey at the end. Use it to make butter or sour cream!
heat the milk
2. Mix 3 teaspoons of citric acid powder into 1/2 cup of filtered water. Stir until it is completely dissolved. Pour two gallons of milk into a large pot and start to warm it up over medium-low heat. Add the water/citric acid mixture and stir frequently while it heats up to 100 degrees F. Check the temperature often with the thermometer.
3. While the milk is heating up, dissolve 1/2 teaspoon of liquid rennet into 1/2 cup of water.
coagulate with rennet
4. When the milk reaches 100 degrees, remove from the heat and add the rennet mixture. Mix it in with a wooden spoon using an up and down motion to properly distribute the rennet. Don’t stir in circles. Gently move your spoon up and down in the milk for about 30 seconds and then stop. You want the milk to be still for the next step.

5. Put a cover on the pot and let it sit for 10 minutes. After 10 minutes, check for a clean break to make sure the milk has properly coagulated. To do this, poke your finger down into the curd mass and lift it up letting the curd break over your finger. If the curd has set, it will split apart over your finger in a clean break. If it is not ready yet, it will be soft and will not split. If this is the case, cover and let it sit for another 5 minutes.

cut the curds
6. Use a long knife to cut the curds in a grid pattern. Cut all the way to the bottom of the pot.
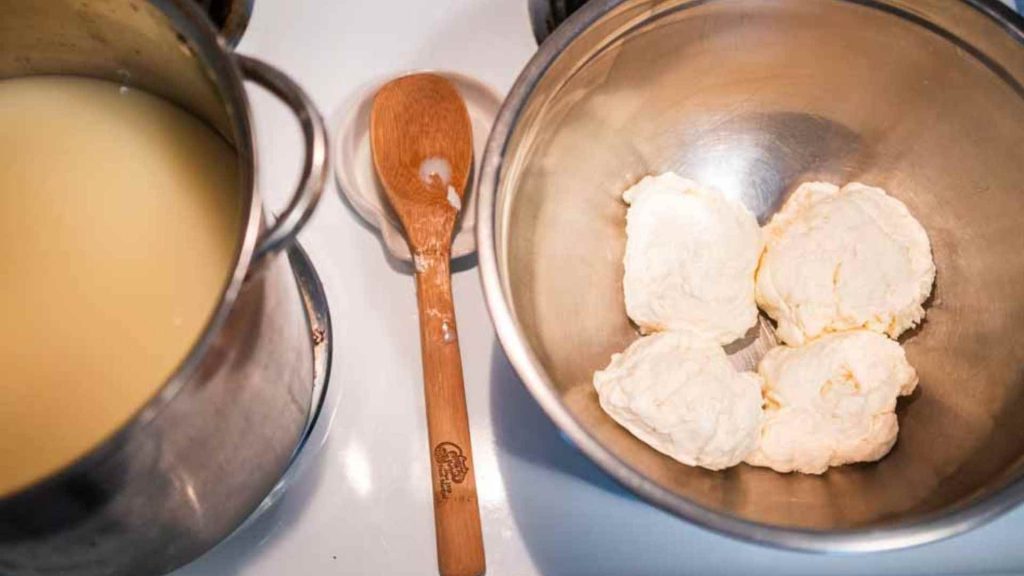
7. Use a strainer to scoop the curds out of the pot and dump them into a large bowl. You can gently press the the curds in the strainer to release some of the whey. Repeat this until all of the curds are removed and only the leftover whey is left in the large pot.


strain the whey
8. Once all of the curds are out of the pot, begin to reheat the whey over medium heat. While it’s heating up, squeeze the curds in the bowl to remove as much of the whey as you can. Divide the curd mass into 4 balls and press each one out individually.
9. Test the whey to make sure it’s hot. It should be too hot to put your hands into, but not boiling. You will want to wear rubber gloves for this portion. When the whey is hot, drop each mozzarella ball into the hot whey. While they warm up on the bottom of the pot, prepare an ice water bath. You will want a bowl of ice water close by to cool down the cheese when you’re finished.
stretch the cheese
10. Take one ball of cheese out of the pot. The outside should be smooth after sitting in the hot whey. Turn the ball inside out to expose the inside, which will not be as smooth. Form it back into a ball and drop it back into the pot. Repeat with the other 3.
11. Next, you should be able to stretch your cheese. Take one ball of cheese out of the pot and stretch it as far as you can before it starts to break. When it starts to break, fold it over and stretch again. Repeat as many times as you are able before the cheese cools down too much to stretch. When this happens, form it back into a ball and drop it back into the pot. Repeat with the other 3.

salt the cheese
12. After all 4 of the mozzarella balls have been stretched, take each one out and stretch again, but this time you’re going to add salt. Stretch the cheese again (you don’t have to stretch as far this time) and sprinkle salt over the top. Fold it and salt again. I don’t measure, but I usually use about 1/2 Tablespoon of sea salt for each ball, but feel free to use more or less depending on how salty you like your cheese. After salting, roll the cheese back into a ball and drop into the cool water. If the cheese has cooled down too much to form into a ball, you might need to dip it into the hot whey again before it will stay in the shape you want it. Repeat with the other 3.
13. Store the cheese in an airtight container in the refrigerator. Add a little bit of whey to the container so the cheese does not dry out. Enjoy your homemade raw milk mozzarella cheese!

storing homemade mozzarella cheese
Store in an airtight container in the refrigerator with a bit of whey. It will keep for about one week. Alternatively, you can wrap it well and freeze for up to 6 months.
what to do with raw milk mozzarella cheese
- Our favorite – use it on sourdough pizza
- Make a grilled cheese with fresh basil on sourdough sandwich bread
- Put it on a salad
- Use it in lasagna or on pasta
- Add to scrambled eggs or frittata
- Use it to make homemade mac and cheese
how to use leftover whey
– Substitute whey in a homemade bread recipe or other baked goods that call for milk or water.
– Use whey to cook oatmeal, rice, potatoes, or pasta. Boiling the whey will cause it to lose some of the benefits of it being raw. But it’s still a good way to use it up instead of dumping it.
– Add whey to fruit smoothies.
– Use whey in soups and stews.
– Feed it to dogs or chickens. Pour it over animal food and they will enjoy a protein rich treat!

more raw milk recipes you will love
print this homemade mozzarella cheese recipe
Raw Milk Mozzarella Cheese
This raw milk mozzarella cheese is so creamy and salty, and honestly just tastes so fresh. It's so delicious on pizza, lasagna, or just as a snack. Learn how simple it is to make homemade cheese!
Ingredients
- 2 gallons raw milk
- 3 teaspoons citric acid powder
- 1/2 teaspoon animal rennet
- 1 cup filtered water, divided
Instructions
- Scoop the cream off the top of the raw milk. Most of the cream is squeezed out during the cheesemaking process, so it makes sense to remove it first instead of it ending up in the pot with all of the excess whey at the end.
- Mix 3 teaspoons of citric acid powder into 1/2 cup of filtered water. Stir until it is completely dissolved. Pour two gallons of milk into a large pot and start to warm it up over medium-low heat. Add the water/citric acid mixture and stir frequently while it heats up to 100 degrees F. Check the temperature often with the thermometer.
- While the milk is heating up, dissolve 1/2 teaspoon of liquid rennet into 1/2 cup of water.
- When the milk reaches 100 degrees, remove from the heat and add the rennet mixture. Mix it in with a wooden spoon using an up and down motion to properly distribute the rennet. Don't stir in circles. Gently move your spoon up and down in the milk for about 30 seconds and then stop. You want the milk to be still for the next step.
- Put a cover on the pot and let it sit for 10 minutes. After 10 minutes, check for a clean break to make sure the milk has properly coagulated. To do this, poke your finger down into the curd mass and lift it up letting the curd break over your finger. If the curd has set, it will split apart over your finger in a clean break. If it is not ready yet, it will be soft and will not split. If this is the case, cover and let it sit for another 5 mintues.
- Use a long knife to cut the curds in a grid pattern. Cut all the way to the bottom of the pot.
- Use a strainer to scoop the curds out of the pot and dump them into a large bowl. You can gently press the the curds in the strainer to release some of the whey. Repeat this until all of the curds are removed and only the leftover whey is left in the large pot.
- Begin to reheat the whey over medium heat. While it's heating up, squeeze the curds in the bowl to remove as much of the whey as you can. Divide the curd mass into 4 balls and press each one out individually.
- Test the whey to make sure it's hot enough to stretch the cheese. It should be too hot to put your hands into, but not boiling. You will want to wear rubber gloves for this portion. When the whey is hot, drop each mozzarella ball into the hot whey. While they warm up on the bottom of the pot, prepare an ice water bath. You will want a bowl of ice water close by to cool down the cheese when you're finished.
- Take one ball of cheese out of the pot. The outside should be smooth after sitting in the hot whey. Turn the ball inside out to expose the inside, which will not be as smooth. Form it back into a ball and drop it back into the pot. Repeat with the other 3.
- Next, you should be able to stretch your cheese. Take one ball of cheese out of the pot and stretch it as far as you can before it starts to break. When it starts to break, fold it over and stretch again. Repeat as many times as you are able before the cheese cools down too much to stretch. When this happens, form it back into a ball and drop it back into the pot. Repeat with the other 3.
- After all 4 of the mozzarella balls have been stretched, take each one out and stretch again, but this time you're going to add salt. Stretch the cheese again (you don't have to stretch as far this time) and sprinkle salt over the top. Fold it and salt again. I don't measure, but I usually use about 1/2 Tablespoon of sea salt for each ball, but feel free to use more or less depending on how salty you like your cheese. After salting, roll the cheese back into a ball and drop into the cool water. If the cheese has cooled down too much to form into a ball, you might need to dip it into the hot whey again before it will stay in the shape you want it. Repeat with the other 3.
- Store the cheese in an airtight container in the refrigerator. Add a little bit of whey to the container so the cheese does not dry out. Enjoy your homemade raw milk mozzarella cheese!
Notes
- If you are opting to use milk from the grocery store instead of raw milk for this recipe, any milk will work (whole milk, 2%, skim) as long as it is NOT ultra-pasteurized milk. This method of ultra high temperature (UHT) pasteurization denatures the proteins in the milk so that they are unable to solidify into curds.
- The fresher the better when using raw milk to make cheese. I try not to use milk that is older than 3 days past milking. The more time that passes, the more time different bacteria can develop and interfere in the cheesemaking process. Older milk usually still works, but might just look a little different at each step.
- If you are using your homemade raw mozzarella cheese in a recipe where you want it to melt, try shredding it instead of cutting it into cubes or slices. Homemade mozzarella melts differently that store-bought, largely because it is easily overworked during the stretching process.
- I don't heat the milk above 100 degrees F so that I can preserve as many nutrients and enzymes as I can in the raw milk.
- Cheesemaking is a bit of work, so I like to use two gallons of milk which usually yields about two pounds of cheese. If you don't need this much cheese of you don't want to use that much milk (or you don't have a pot large enough to comfortably hold two gallons of milk), this recipe can be divided in half. All of the steps are the same.
- After making cheese, you will be left with a lot of whey. Don't worry - that doesn't need to be wasted! There are some ideas in the post on how to use up leftover whey.
- Animal rennet comes from the inside of a calf's stomach. Because the calf must die in order to harvest the rennet, some people choose to use vegetable rennet instead. Just FYI that is an option.
pin this recipe for later –
This looks so great! Ive always wanted to give this a try! I might just do that!!!!!!
It’s so fun!! I hope you love it 🙂
May be a silly question but – do you use regular rubber gloves, like what you would wash dishes with? Or is there a food grade version? Thanks!
What temperature is your rennet to get your mozzarella to stretch?
What temperature is your **whey when you add your curd back in. Like 140? 160?