
Rosemary Garlic Sourdough Artisan Bread
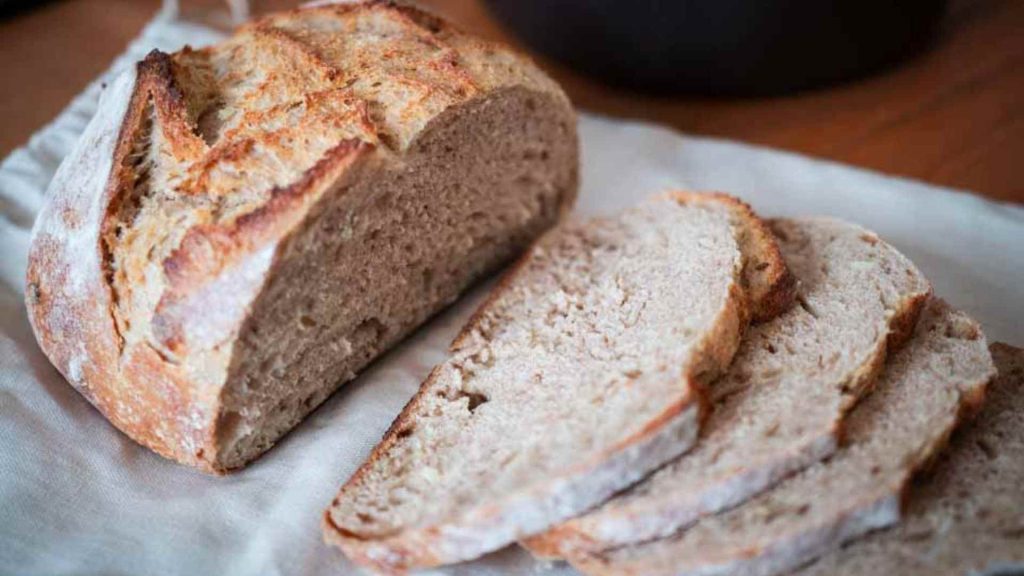
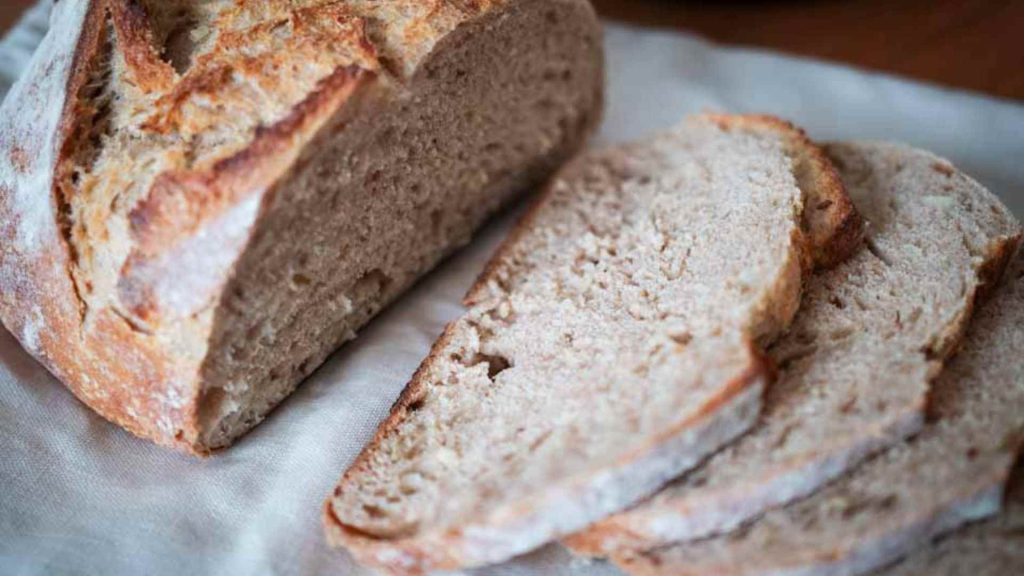
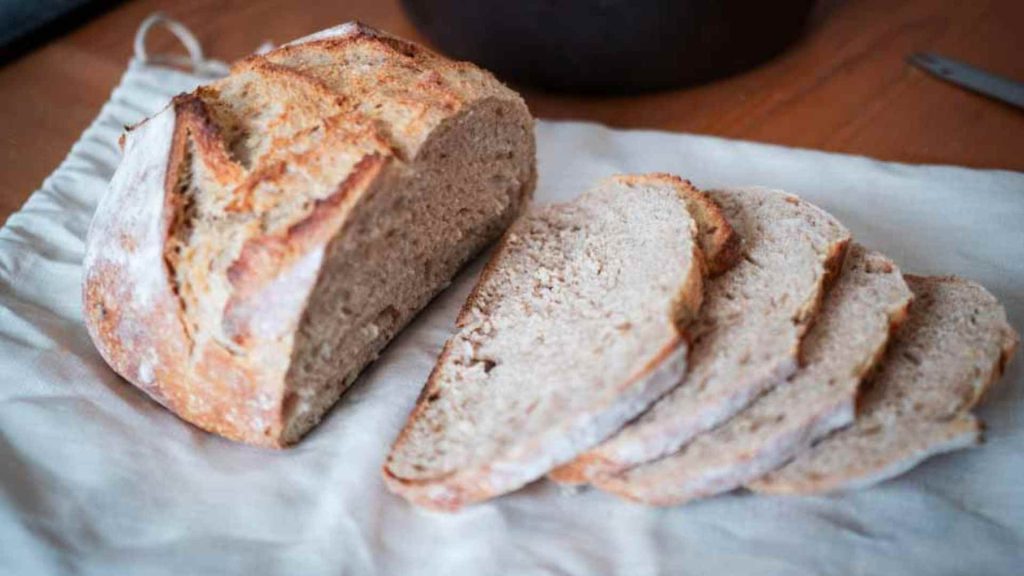
My favorite loaf of classic sourdough bread just got an upgrade in this beautiful and rustic Rosemary Garlic Sourdough Bread. Crusty on the outside and soft and chewy on the inside, so much flavor is packed into this delicious loaf. Serve it warm with soup or turn it into the most incredible grilled cheese!

This post contains affiliate links. As an Amazon Associate, I receive a small commission at no extra cost to you. Read my full disclosure here.
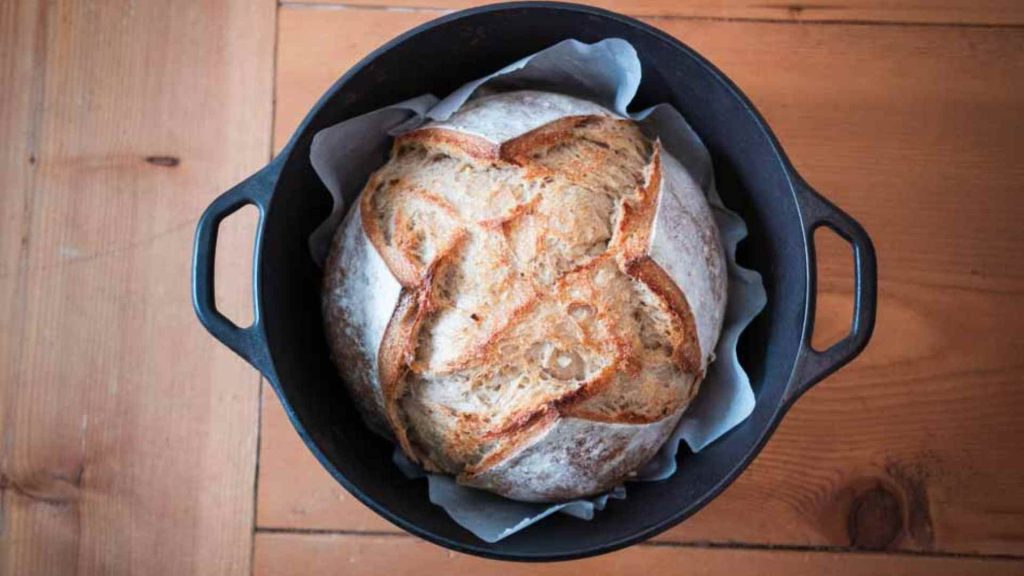
There is nothing better than a rustic, crusty loaf of sourdough homemade bread fresh out of the oven. The soft and chewy interior is full of holes that soak up melted butter and the crispy crust is so good for dunking in soup. Plus, these dutch oven loaves come out looking so beautiful. I love how no two loaves of sourdough bread ever look completely the same – it’s fun to open the lid on the hot dutch oven and see how they take shape each time!
This Rosemary Garlic Sourdough Bread is a delicious variation of a classic sourdough boule. Cloves of fresh garlic and fresh or dried rosemary bring an already delicious bread to the next level. Learn how to make this beautiful sourdough loaf with just a few simple ingredients.
what is sourdough?
Let’s start at the very beginning. What is sourdough bread? Sourdough bread is bread that has been leavened naturally, by naturally occurring yeast in the form of a sourdough starter instead of using commercial yeast or a chemical leavening agent such as baking powder or baking soda.
benefits of sourdough –
- Sourdough bread is kind to your gut.
- Delicious “sour” or slightly tangy flavor.
- Fermenting the grains gives sourdough bread a longer shelf life.
- The process of making sourdough bread is fun!
all about sourdough starter –
A sourdough starter is a live fermented culture of fresh flour and water. Once combined, the culture will begin to ferment and cultivate the natural yeasts found in our environment. A small portion of a heathy and active starter is added to your bread dough to make it rise. Commercial yeast is not required.
Sourdough starter can be used at its “active” state for making bread. A sourdough starter’s peak strength is usually about 4-6 hour after feeding a mature starter. If more time has passed and the starter has reached peak strength and has since deflated, this can be used in sourdough “discard” recipes.
Now, “discard” does not mean I actually throw it away. I stash it in the fridge to save for a sourdough discard recipe like these:
- Sourdough Discard Scones
- Sourdough Pancakes or Waffles
- Sourdough Chocolate Chip Cookies
- Sourdough Buttermilk Biscuits
- Sourdough Pie Crust
- Sourdough Discard Crackers
- Sourdough Crepes
how to know if your starter is ready to use
If your starter doubles in size within 4 to 8 hours after a feeding, it is ready to go. This is when it is at its peak strength, so this is the time frame that you would ideally want to use it for baking. An easy way to tell if your starter has doubled in size is to put a rubber band around the jar that your starter is in when you feed it. Mark the height of the starter right after you feed it, so you can easily see when it has doubled in size and is ready to use.
Another way to test how active your starter is is the float test. After your starter has doubled in size, drop a spoonful into a glass of water. If it floats, it’s strong enough to rise bread!
everything you’ll need to make rosemary garlic sourdough bread
ingredients
Active, bubbly starter: Before you plan to bake sourdough bread, feed your own sourdough starter a 1:1:1 ratio. This means equal parts starter, flour and water. When your starter has doubled (or tripled) in size and is very bubbly, it is ready to bake delicious sourdough.
Flour: For best results, use a combination of organic unbleached all purpose flour, bread flour and freshly ground or whole wheat flour
Filtered water: – I use water filtered by our Berkey. Room temperature or warm water work best.
Salt – a high quality salt like Redmond Real Salt
Rosemary: Rosemary is so fragrant with tones of pine and citrus. Dried rosemary works just fine but you know I’ll be using fresh rosemary come spring when the herb gardens are overflowing with beautiful herbs!
Fresh garlic: A few cloves of fresh garlic make this bread so savory and delicious
equipment
- Kitchen scale
- Straight-sided jar – for easily monitoring the rise and fall of your starter
- Large bowl – for bulk fermentation, the weight of this bowl makes stretching and folding the dough much easier
- Banneton basket – or a bowl lined with a floured tea towel
- Bread lame – or a razor blade or sharp knife – for scoring the bread
- Dutch oven – this is the best dutch oven I have found without spending a lot of money


steps to make rosemary garlic sourdough bread – an overview
Mix the dough. First, combine the flour and water to allow the flour to absorb the moisture. Then, add active sourdough starter, salt, rosemary and garlic to form a sticky ball. Knead for 5-10 minutes to fully incorporate the ingredients and begin to work the gluten.
Bulk ferment. This is an extended period of time that will allow the dough the first rise. During the first two hours of the bulk ferment, you will perform a set of coil folds which will give the dough strength and elasticity.
Shape & rest. This is the end of the bulk ferment. You will shape the dough, let the dough rest, and then shape it again.
Cold proofing the dough. This is when you refrigerate the dough for at least 12 hours, ideally. The easiest time to do this is overnight.
Scoring & baking the dough. After the dough has cold proofed, it is time to bake! The next morning, turn it out onto a piece of parchment paper, score it, and bake it in a preheated dutch oven.
step by step instructions to make rosemary garlic sourdough bread
Mix the Dough
1. Combine flour and water in a large bowl. Mix with a wooden spoon or dough whisk until it is thoroughly combined. Let sit for about half an hour so the flour can absorb the liquid. Then add the sourdough starter, salt, rosemary and garlic. Knead with wet hands about 5-10 minutes until all the ingredients are well combined and a shaggy dough forms.
Bulk Fermentation
2. Cover with plastic wrap or a damp towel and let the dough rest for 30 minutes at room temperature. After 30 minutes, begin a series of coil folds. Perform a total of 4 coil folds every 30 minutes for the first 2 hours. Coil folds help to develop the gluten in a gentle manner. To coil fold: gently loosen the edges of the dough by pulling it away from the sides of the bowl. Place your fingertips under the dough so you can pick it up in the middle. Supporting the middle, allow the dough to fall on either side of your hands. Place one side down into the bowl first, and then the other so it folds like a letter. Turn the bowl 90 degrees and repeat – so you perform 2 coil folds per set.
3. Cover and let the dough rise until it has doubled in size. The amount of time that this takes will vary depending on the temperature in your kitchen. A warmer environment will cause the dough to rise much faster than a cooler environment.

Shape & Rest
4. Turn the dough out onto a lightly floured work surface. Tuck the edges underneath the dough ball and gently pull and push it away from you to build tension in the loaf. You want it to stick to your work surface just slightly so there is a little resistance there. Let the dough rest for 15 minutes.
5. Then, shape the dough into a loaf. Gently press the bread dough slightly flat without popping all of those precious bubbles. Fold in thirds like an envelope, and then gently roll it up so the seam is hidden. Pinch the seam and sides closed. Place the loaf seam side up into a floured banneton basket.

Cold Proofing
6. Cover the banneton basket with plastic wrap, a shower cap, or a plastic bag tied up. You don’t want the dough to dry out in the fridge. Refrigerate for 12-24 hours.
Scoring & Baking
7. When you’re ready to bake your bread, preheat the oven temperature to 500 degrees F. Place a dutch oven into the oven to preheat as well. Make sure that the cast iron dutch oven has a tight-fitting lid. After 45 minutes to an hour, remove the hot dutch oven. Turn out the loaf of rosemary garlic sourdough bread dough onto a piece of parchment paper. Lightly flour the top of the dough. This will make your scoring pattern stand out more.

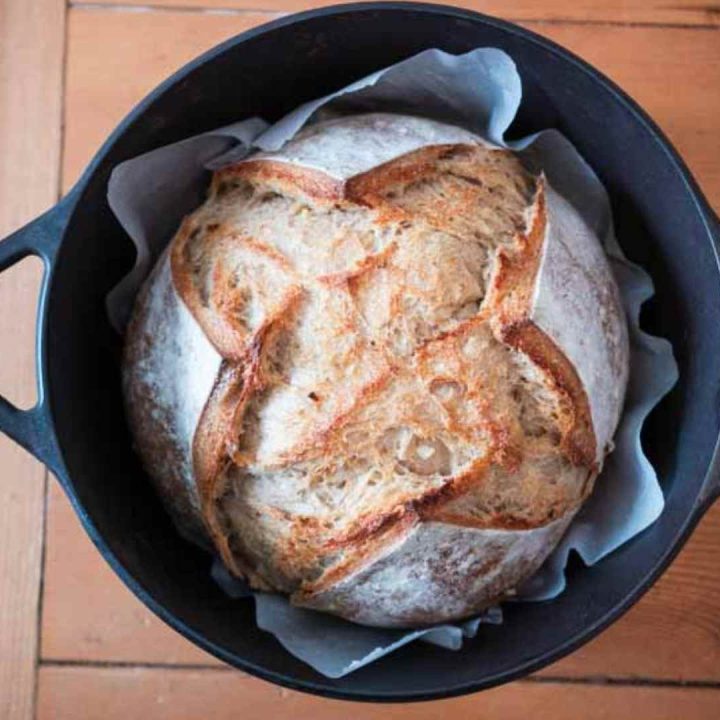
8. To score the dough – use a bread lame, a razor blade or a sharp knife to cut at least one deep cut into the loaf of bread. This can be curved or straight. This is called the expansion score. This is where the bread will expand instead of breaking apart in random places all over the top of the loaf. Next, if you’d like to, add smaller cuts to make a pattern or design. These cuts are called the decorative score, and should not be as deep. For this loaf, I made two deep cuts in an X shape.
9. Place the loaf into a hot dutch oven and bake for 25 minutes. This time of baking at high heat will give the loaf a beautiful oven spring. Oven spring is when the dough hits the hot oven and puffs up in size before the crust starts browning. After 25 minutes, turn the heat down to 450, remove the lid and bake another 10-15 minutes, until the crust is golden brown. Bake it to your liking – the longer you bake it, the darker the crust will be. I like to take it out when the crust is a beautiful golden brown.
10. Remove from the oven and cool on a wire rack for 1 hour before slicing.

sample sourdough baking schedule
If you are new to sourdough bread baking, the timing of it all may feel overwhelming – I totally get it! One very helpful tool in sourdough baking is the refrigerator! After you complete the dough on Day 2, it can stay in the refrigerator for up to 2 days. This will allow you some flexibility in the time you prepare the dough and when you bake it so you can have it fresh. Here is a rough schedule that I like to follow, and you can adapt it to work for you:
Day 1:
Evening – Remove sourdough starter from the fridge and feed it 1 part flour and 1 part water, by weight. Leave at room temperature overnight.
Day 2:
8:00 AM – Discard some of the sourdough starter from the night before and feed the remaining starter, 1 part flour and 1 part water, by weight.
12:00 PM – Mix flour and water.
12:30 PM – Add sourdough starter, salt, rosemary and garlic and knead by hand for 5-10 minutes.
1:30 – 3:00 PM – Coil fold the dough every 30ish minutes. Total of 4 coil folds.
6:00-8:00 PM – Turn the dough out. Form a ball and gently push it away and pull it toward you, building tension. Let rest 15 minutes, then shape the loaf. Place in a banneton basket and cover. Refrigerate overnight.
(The timing of this step depends on the temperature of your kitchen, a warmer kitchen means your dough will double in size sooner and be ready for this step earlier than a cooler kitchen.)
Day 3:
Anytime – Preheat a dutch oven in 500 degree oven. Score and bake the bread. Let cool before slicing.
tips for scoring sourdough bread
Score directly from the refrigerator – cold dough is much easier to score, and the contrast in temperature will help with the dough rise even higher
Use a specialized tool – a razor blade or a bread lame are ideal for scoring
Create a score that’s wide enough and deep enough to allow your bread to rise – your expansion cut should be at least ¼ to ½-inch deep and should be large enough to allow your bread to rise fully. If you fail to score your dough enough, your bread may burst
Don’t score your dough too aggressively – the depth of the cut matters, if you cut too deep into your dough it may destroy the structure you’ve worked so hard to create during the bread making process
Coat your blade in a thin layer of oil – if you find that your blade drags while you’re scoring, rub a little bit of oil on your blade to help it glide smoothly through your dough
Make quick, confident cuts: scoring too slow will cause even the sharpest blade to drag and leave ragged marks on your dough
Bake your dough right away – letting your dough sit for too long before putting it in the oven may cause it to deflate and lose its strength

sourdough bread troubleshooting
If you ever have sourdough bread not turn out, it’s like caused by one or more of these common issues:
1. Your starter is too weak. Using a strong starter is the only way this bread will turn out.
2. Using too much water. This can depend on the humidity at the time of year. Adjust the amount of water depending on the season. On a humid, summer day, you will not need as much. The dough should be slightly sticky, but not too sticky to handle.
3. Overfermentation. You don’t want to let either the first or second rise go too long. Overfermenting the dough will make it so sticky and goopy you won’t be able to handle it.
4. Using too much whole wheat flour or freshly milled flour. Whole grain flours absorb more water than white flour and can result in a denser crumb.
While learning to make sourdough bread, I made many loaves that suffered from one or more of these issues. If that happens, don’t throw it away! Still bake it, and turn it into Sourdough Croutons or breadcrumbs. Very, very rarely does sourdough bread actually need to be thrown away!
try more sourdough recipes!
- Sourdough Artisan Bread
- Soft Sourdough Sandwich Bread
- Sourdough Cinnamon Rolls
- Garlic Sourdough Breadsticks
- Sourdough Banana Bread
- Sourdough Dutch Baby
- Sourdough Buttermilk Biscuits

recipe card for rosemary garlic sourdough bread
Rosemary Garlic Sourdough Bread
Beautiful and rustic rosemary garlic sourdough bread is crusty on the outside and soft and chewy on the inside, so much flavor is packed into this delicious loaf.
Ingredients
- 275 grams organic, all purpose flour
- 125 grams bread flour
- 125 grams freshly milled or whole wheat flour
- 350 grams filtered water
- 125 grams active sourdough starter, at peak strength
- 12 grams salt
- 3 cloves fresh garlic, minced
- 2 Tablespoons fresh or dried rosemary
Instructions
- Combine flour and water in a large bowl. Mix with a wooden spoon or dough whisk until it is thoroughly combined. Let sit for about half an hour so the flour can absorb the liquid. Then add the sourdough starter, salt, garlic and rosemary. Knead with wet hands about 5-10 minutes until all the ingredients are well combined and have formed a sticky ball.
- Cover with plastic wrap or a damp kitchen towel and let the dough rest for 30 minutes. After 30 minutes, begin a series of coil folds. Perform a total of 4 coil folds every 30 minutes for the first 2 hours.
- Cover the dough and allow it to rise until it has doubled in size. The amount of time that this takes will vary depending on the temperature in your kitchen. A warmer environment will cause the dough to rise much faster than a cooler environment.
- Turn the dough out onto a lightly floured work surface. Tuck the edges underneath the dough ball and gently pull and push it away from you to build tension in the loaf. You want it to stick to your work surface just slightly so there is a little resistance there. Let the dough rest for 15 minutes.
- Then, shape a loaf. Gently press the bread dough slightly flat without popping all of those precious bubbles. Fold in thirds like an envelope, and then gently roll it up so the seam is hidden. Pinch the seam and sides closed. Place the loaf seam side up into a floured banneton basket.
- Cover the banneton basket with plastic wrap, a shower cap, or a plastic grocery bag tied up. You don't want the dough to dry out in the fridge. Refrigerate for 12-24 hours.
- When you're ready to bake your bread, preheat the oven temperature to 500 degrees F. Place the dutch ovens into the oven to preheat as well. Make sure that each cast iron dutch oven has a tight-fitting lid. After 45 minutes to an hour, remove the hot dutch oven. Turn out the loaf of bread onto a piece of parchment paper. Lightly flour the top. This will make your scoring pattern stand out more.
- To score the dough - use a bread lame, a razor blade or a sharp knife to cut at least one deep cut into the loaf of bread. This can be curved or straight. This is called the expansion score. This is where the bread will expand instead of breaking apart in random places all over the top of the loaf. Next, if you'd like to, add smaller cuts to make a pattern or design. These cuts are called the decorative score, and should not be as deep.
- Place each loaf into a hot dutch oven and bake for 25 minutes. This time of baking at high heat will give the loaf a beautiful oven spring. After 25 minutes, turn the heat down to 450, remove the lid and bake another 10-15 minutes, until the crust is golden brown. Bake it to your liking - the longer you bake it, the darker the crust will be.
- Remove from the oven and cool on a wire rack for 1 hour before slicing.
Notes
To coil fold: gently loosen the edges of the dough by pulling it away from the sides of the bowl. Place your fingertips under the dough so you can pick it up in the middle. Supporting the middle, allow the dough to fall on either side of your hands. Place one side down into the bowl first, and then the other so it folds like a letter. Turn the bowl 90 degrees and repeat - so you perform 2 coil folds per set.
pin this recipe for later